Tuesday, 15 February 2011

The making of my final design. :)

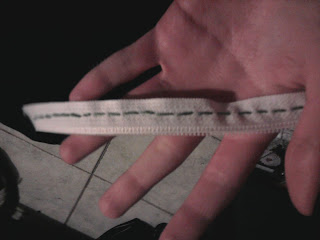
I started of by creating the actual choker, I hand stitched a zip together, so that the teeth were facing outward, I then stitched green embroidery thread down the middle of them, and I attached a press-stud on each end so it would fasten up.


Once the strap was complete, I began making the flower out of zip to attach on to it. I used a cream zip, and stitched green embroidery thread the centre of it.


So that the zip would keep it's shape, I stitched copper wire to it, as shown below.


I then manipulated the zip to form a flower, I found this bit quite tricky and fiddly as the wire was harder to bend than I thought it would be, anyway, eventually I managed to bend it to the shape I wanted it to be, and I put a few stitches in to help hold it in place.


I then stitched the flower onto the actual choker in the place I wished it to be.


So yeah, here is my final product. I don't feel that the colour scheme worked as well as I would have liked it to, however I am happy with the way the strap turned out.


Tuesday, 8 February 2011

My chosen design.

We have created 20 designs for our accessory that must incorporate our YKK zip, we had to also take inspiration from our observational drawings, and try to include a technique from one of our workshops. 


This is my chosen final design, a choker. I took inspiration from various nature inspired surface pattern (images below, Primary sources). The actual chain will be of a zip taken apart, and put back together so that the teeth are facing outward, I will hand-stitch them together. The 'flower petals' will be made from a zip which I will manipulate to create the shape I want, and I will stitch it into place, I may need to thread copper wire through it to hold the structure and shape. In the centre of the flower I will have the slider. I may also place a lace type effect, which we learnt in one of the workshops, in the centre.


Hopefully my design will work the way I want it to. :)